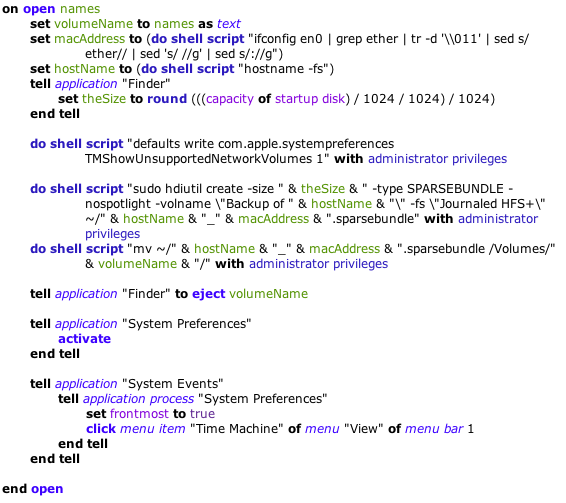
Last week, i bought an external NAS server by Lacie, intended primarily as Time Machine backend support server. Unfortunately, Apple doesn't support natively network disks other than Time Capsule as time machine disks. However, you can adjust this behaviour using your property list editor or from console using a defaults write:
After that, you need to prepare in your home folder a SPARSE disk image to use for your backup:
-volname "Backup of yourHostname" -fs "Journaled HFS+" \
~/hostName_macAddressOfYourHost.sparsebundle
you need to make it in your home, since hdiutil doesn't support sysioctl over network disks.
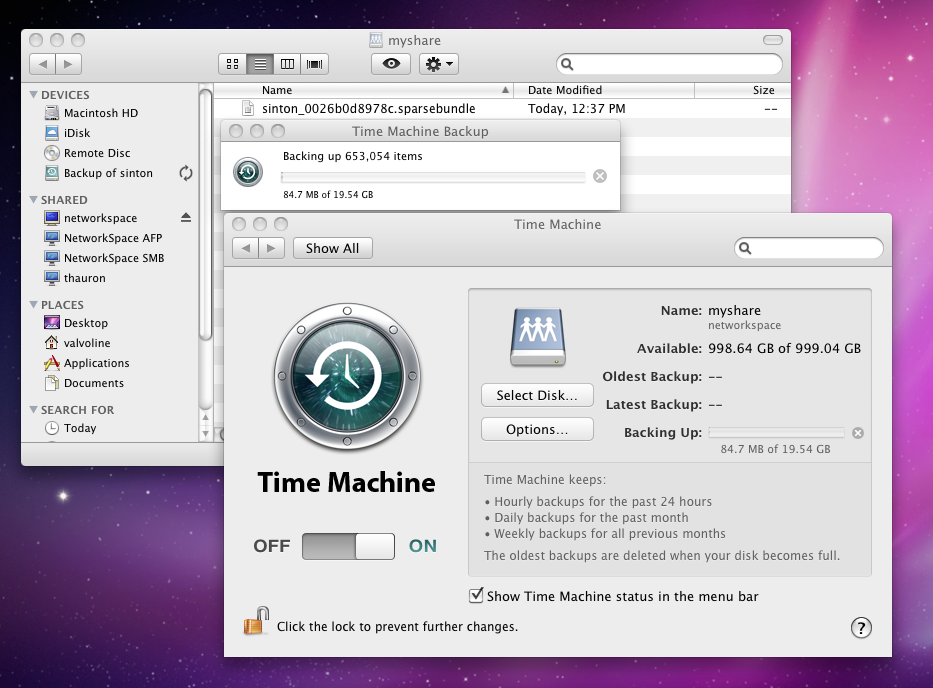
After completition, move your freshly created sparseimage onto your network drive. unmount it and open time machine. now you should be able to use your network volume as target disk for time machine backup.
Below there is an applescript proof to make the dirty work. just drag your network volume onto applescript to start the process.
Restore your backup from a network drive (NAS)
Insert your MacOS installation disk and start your Mac. After loading, choose "Terminal" from Utilities and mount your external disk. Installer enable by default the DHCP for interface en0; if the NAS is configured for DHCP, than it will get a reachable IP address. To discover it, try to ping the whole submask using the ping tool:
PING 169.254.255.255 (169.254.255.255): 56 data bytes
64 bytes from 169.254.101.39: icmp_seq=0 ttl=64 time=0.299 ms
64 bytes from 169.254.101.39: icmp_seq=1 ttl=64 time=0.368 ms
64 bytes from 169.254.101.39: icmp_seq=2 ttl=64 time=0.368 ms
^C
--- 169.254.255.255 ping statistics ---
3 packets transmitted, 3 packets received, 0.0% packet loss
round-trip min/avg/max/stddev = 0.299/0.345/0.368/0.033 ms
The address that respond to your ping is the NAS. Let's make a mount point for our disk:
Next, you have to mount it in your freshly created mountpoint:
Be sure to specify entirely the address of your NAS server, including the resource ( myshare, in the above example ). Finally, you have to notify about your new mounted device to the Finder:
Will list you all the new mounted decice in your system. Look for the rows beginning with:
***Disk Appeared ( 'something' ...
Find the one containing your NAS mountpoint. Write down the first entry and use it as parameter for the following command:
Close the terminal and proceed as normal with your installation. When asked to resume from a time machine backup, choose the network disk.
You can download the application bundle and applescript source using the link below.
happy backup!